Deep Dive Into Digestion
April 8, 2021
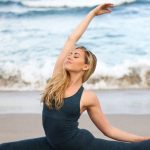
Find Your Center: The Power of Balancing Poses
April 20, 2021Fascial Release Sequence To Help Relieve Tension

What is Fascia?
Fascia is a thin layer of densely woven connective tissue that covers nearly everything in the body. It covers muscles, muscle groups, organs, organ groups, every bone, nerve, artery, vein, the brain, and the spinal cord.
Fascia not only provides structure, but it also contains nerves that make it sensitive like skin. While fascia may appear to be one layer, it is actually many thin layers woven together with liquid, called hyaluron, between the layers.
Fascia should move easily, but factors such as too little movement, too much repetitive movement, surgery, physical or emotional trauma can cause the fascia to become bound up, and gummy- called adhesions.
Myofascial Release Benefits
Myofascia refers to the fascia that covers the muscles. Practicing self myofascial release or receiving myofascial release therapy is beneficial for:
- increased circulation
- increased range of motion
- decreased pain, tension, and stress
- aids the tissues in recovery
- beneficial for relaxation
Sequence
Use the below yoga flow within your class at the beginning or end of class, or as its own practice to help your students (or yourself!) relieve tension, increase mobility, and feel good! You’ll need one yoga block and one tennis, or lacrosse ball.
Ball Under Feet
Stand upright with a tennis or lacrosse ball under your foot.


- Begin at the heel and alternate pressing down into the ball and relaxing several times all over the heel to warm up.
- Then move up the foot to the space where the heel and arch meet. Alternate pressing down and releasing all along this space. It may feel good to roll along this space while applying pressure.
- Move to the arch and roll forward and back along the heel. As you roll, alternate pressing and releasing. Then roll in circles along the arch.
- Move to the space where the arch meets the ball of the foot. Press and release along this space.
- Move to the ball of the foot. Press and release all along the ball of the foot.
Spend several breaths or up to a minute in each spot. Then, switch feet.
Block Under Calves
Sit with your leg extended and the block angled against the space where the gastrocnemius and soleus muscles meet. Scoot forward to wedge the block into place.
- Roll your leg side to side, internally and externally rotating from the thigh.
- As you roll, point and flex your foot along any space that you’d like to get deeper into.
- You can also roll your ankle in circles here.

Then, move the block to the belly of the gastrocnemius. Scoot forward again to wedge the block into place.
- Repeat the same actions as above. Roll side to side, point and flex, and circle your ankle.
Plan to spend a few minutes in each position. Then, repeat on the other leg.

Piriformis Release with a Ball
Sit in a figure four position with one ankle crossed over your opposite thigh. Place a small ball like a tennis ball or lacrosse ball under the glute that is stretching.
- Roll in small circles and feel for what areas need attention.
- Roll side to side, and forward and back all along your glutes and outer hip.
Spend a few minutes on one hip, then repeat on the other side in this yoga flow.


Side Body Release with a Block
For the first position, lie on your right side with the block on the lowest height and the bottom edge of the block just below the bottom rib.

- If this feels too intense, stay upright on your right forearm for support. For more intensity, extend your right arm out overhead and lay your head on your right shoulder.
- Breathe into your right side body. Either stay still, or rock forward and back to help release the fascia.
- If you still need more intensity, extend your left arm overhead for added weight.
- Stay for several deep breaths, or up to a few minutes.
For the second position, turn the block on its side at medium setting. Place the edge of the block just below your armpit, or right about at the armpit.

- Lie on your side with your right arm extended out overhead. Your left hand can stay on the ground for support, or for more intensity, reach your left arm over head to add weight.
- Breathe into your right side body. Either stay still, or rock forward and back to help release the fascia.
- You can adjust by moving the block up or down an inch until it feels right.
- Stay for several deep breaths, or a few minutes.
Arm Glides with a Ball under the Shoulder (Supine)
In this portion of the yoga flow, lie on your back with a small ball like a tennis ball at the right shoulder, between the inferior edge of the scapula and the spine. Extend your right leg straight and bend your left knee. If this is immediately too intense, lay a folded blanket under the left side of your back to elevate it.


- With your palm facing up, glide your arm from down by your hip to as high towards your head as is manageable. There should be no intense pinching sensations or nerve tingling sensations. Then, glide back down towards your hip. Repeat this three times or more if desired.
- Do the same thing, but with your palm facing down.
Next, move the ball to the medial edge of the scapula. Between the scapula and spine.


- Repeat arm glides with palm facing up, and then again with palm facing down.
- Do this three times each, or more if desired.
Finally, move the ball to the superior edge of the scapula.


- Repeat arm glides with palm facing up, and then again with palm facing down.
- Do this three times each, or more if desired.
Neck Release with a Block
Lie down on your back with bent knees. Place the edge of a block on the lowest setting angled at the occipital ridge, just below the edge of your skull. The block should be angled with the angle of your neck, not against it. If the block feels unstable, place an additional block behind it for support.
- Relax your head back onto the block. Take some deep breaths and encourage your neck and jaw muscles to relax.
- Move your head very slowly from side to side along the block.


As you move, feel for any adhesions, trigger points, or places that need extra attention. Spend extra time in these places. Relax your head into the trigger point for a few breaths, or if that’s too intense, move the weight of your head onto the trigger point and then away from it slowly until it starts to relax enough to hold pressure there. You can also cross fiber the muscle by tilting your chin up and down.
Stay for a few minutes or longer if desired. Use this yoga flow to help relieve some pressure points & tension in your body.
Check out some of our Yoga Flows on YouTube!
Get Yoga Insurance & Protect Your Yoga Teaching Career Instantly
Save $24