Tristan Gatto: beYogi Ambassador Spotlight
July 9, 2019
Yoga and Shoulders: It’s A Scapular Matter
July 18, 2019Inside The World of Yoga and Anatomy

Anatomy is a hot topic in the yoga world today. A majority of yoga instructors who have graduated from traditional 200-hour teacher trainings complain that there is not enough emphasis on anatomy in many of these trainings. Currently the Yoga Alliance only requires 20 hours of Anatomy and Physiology as part of a 200-hour teaching curriculum. This can leave a newly certified yoga instructor at a loss for what asana may or may not be suitable for certain populations in their classes.
Creating a Safer Environment for Learning
Many clients come to yoga classes to feel better and oftentimes fix issues they may be having in their own body – whether its back pain, flexibility and movement issues, or wanting to get stronger. It is up to each of us as a yoga instructor to provide the best instruction based on our training and promote an environment of safety and support for our clients. This is where personal responsibility and yoga instruction meets the pavement. Continuing education in anatomy, biomechanics, kinesiology, and musculoskeletal dysfunction can amplify your teaching skills two fold.
The main shock absorbers for the spine are the intervertebral discs, which consist of a gel-like material called the nucleus pulposus (similar to the consistency of toothpaste) encased by a thick cartilaginous membrane, or layer. The discs are crucial to spinal health, as they absorb and evenly distribute compressive forces and shock throughout the spine. The discs take the greatest “beating” while sitting.
Make time for change.
Most people who work at a desk, or are in school, sit for up to eight hours a day, if not more, with very few breaks. The average office worker should get up and move or walk for at least two minutes every 20-30 minutes. If this seems unrealistic, a maximum sitting time of no more than one hour may be more reasonable. With time, the body will gradually mold into any shape in which it’s continuously placed. The repetitive sitting shape creates imbalances in the body, resulting in neck, back, and shoulder pain, digestive and circulatory issues, and spinal pathologies. Some common imbalances include:
- Tight calves (gastrocnemius, soleus)
- Tight hip flexors (psoas, rectus femoris)
- Weakened abdominals
- Overstretched spinal erector musculature (erector spinae group)
- Tight shoulders and mid back (trapezius, rhomboids, latissimus dorsi)
- Tight pectorals
- Tightness in the anterior musculature of the neck (scalenes, longus capitus, longus colli)
These five yoga poses can be practiced at your desk to relieve back pain and avoid imbalances. Before attempting any of the following yogic approaches, please note:
- You should not feel anything sharp, shooting, or burning during these exercises. If any of these sensations occur, back off or discontinue altogether.
- The intensity of each stretch should be light to medium. Feel free to back off at any time, or modify as necessary for comfort.
1. Chair Roll Out (modified Child’s pose)
Step-by-step:
If you have a rolling chair, you can use it to your benefit to relieve low back pain. Sit toward the edge of your chair with a wide stance in your legs. Ground your hands down onto your desk, shoulder-distance apart. Using your feet, begin to slowly roll or scoot your chair back and gently lean forward through your outstretched arms until you feel a mild stretch. You should feel a light stretch in your lower and upper back, shoulders, and sides. Hold for at least five slow, deep breaths.
Benefits:
- Releases tight muscles in the lower and mid back
- Opens ribcage and pectorals
- Releases hamstrings
2. Chair Side-to-Side (modified Side Child’s pose)
Step-by-step:
Similar to the exercise above, sit with a wide stance in your legs and place your hands on the desk, shoulder-distance apart. Then scoot your chair back enough to lean the body forward. Slowly begin to walk your hands over to the right and gently lean in until you feel this stretch along your left side. Hold for at least five slow, deep breaths. On an inhale, release the posture, slowly walk the hands over to the left, and gently lean in for the stretch—you will feel this on your right side. Make sure to keep your wrists in line with your shoulders to avoid compression in the front of the shoulder joint.
Benefits:
- Releases tight spinal side flexors
- Opens ribcage and shoulders
3. Chair Twist
Step-by-step:
Begin by sitting toward the edge of your chair. Place your right hand behind you, on the outer edge of the seat, for support. Place your left hand on your right knee. Inhale and sit up tall. As you exhale, gently begin to draw your torso to the right, taking your gaze over your shoulder. Hold for five deep, slow breaths. Inhale as you return to a neutral position. Repeat on the opposite side.
Benefits:
- Improves spinal flexibility
- Nourishes and hydrates abdominal and spinal tissues
- Detoxifies abdominal organs
4. Chair Cobra pose
Step-by-step:
Place your hands and forearms on your desk, shoulder-distance apart, allowing the elbows to rest off the edge of the desk. As you inhale, press your forearms and hands firmly into the desk, allowing your heart center and chin to lift upward. Hold for five deep breaths. To deepen, gently draw the shoulder blades together to open the chest further. Release on your final exhale.
Benefits:
- Opens the chest, stretching the pectorals and breathing accessory musculature
- Allows for deeper, fuller breath
- Decompresses and lengthens the throat and anterior neck musculature
5. Chair Tree pose
Step-by-step:
Stand behind your chair and place your hands on the backrest for support. Set your gaze on an object in front of you. Draw your awareness down to your feet and gently begin to transfer your weight onto your right foot. Imagine pressing through the floor, as you lift up tall in the torso, and feel your right hip firming and drawing in. Place the sole of your left foot at the ankle, calf, or mid-inner thigh. Never place your foot directly on the knee joint. Feel free to leave the hands on the chair, or draw them to prayer or another mudra of your choice. Hold for five deep, slow breaths. Release on an exhale and repeat on the opposite side.
Benefits:
- Activates and balances both sides of the brain and body
- Improves mental focus
- Activates and strengthens the core
- Increases energy levels
Life will always be busy. Jobs are increasingly demanding, time is limited, and no one can afford to lose mobility or function. However, practicing just a few simple, mindful movements with focused breath each day can greatly benefit your body. Protect your spine to protect your body.
Tips for Learning Anatomy and Biomechanics
- Emphasize Muscle Action – while understanding the origin, insertion and innervation of muscles is beneficial, the easiest way to understand and apply anatomy to your teachings is identifying what movement or action each muscle produces. This will allow you to speak toward what you are trying to achieve in your classes. For instance, whether you want to stretch the hamstrings in Pyramid pose or activate it for stability in a lunging posture.
- Understand Joint Movement – each joint in the body moves and operates in its own way, known as arthrokinematics. Knowing the difference between the types of joints and how they move improves awareness of alignment and optimal joint positioning in each posture. Joints either roll, glide/slide, or spin. For instance, during a squat the femur moves on a stable tibia. The femur rolls backward while sliding forward on the tibia. With an anterior force already present on the front of the knee, it is important to cue students to draw the knee joints behind the toes and balls of the feet to protect the knees and keep the joint in Optimal Functional Position (OFP).
- Familiarize Yourself with Agonist/Antagonist Relationship of Muscles – in order to produce movement in a joint, opposing muscles must work together. When one muscle contracts, the opposing muscle relaxes. For instance, if you were to sit in a chair and extend your knee – the quadriceps muscle, located at the front of your thigh, would contract to produce the movement, where as, your hamstrings, located at the back of your thigh, would relax to allow the movement to occur. The awareness of this relationship is important when encouraging students to stabilize in certain postures or allow for relaxation of muscle you may be targeting.
When learning the ins and outs of asana and alignment, it is beneficial as a yoga instructor to continue the study of anatomy and biomechanics beyond your initial training to not only improve teaching skills, but also to keep your students safe and in Optimal Functional Position in the joints. The silver lining in all of this is, now more than ever we have access to information, training, and educational material to gain as much knowledge as we want!
Below you will find, Tristan’s Top 3 Favorite Anatomy Resources:
- Anatomy Trains by Thomas Myers
- Trail Guide to Movement by Andrew Biel
- Your Body, Your Yoga by Bernie Clark
Want to learn more about working with clients who have chronic back issues? Check out Tristan’s Spinal Reset Online Teacher Training – the only training that bridges the gap between physical therapy and yoga. This 50-hour interactive online training will provide you with all the knowledge and tools you need to bring healing to your entire community while tripling your income. Learn more by clicking here.
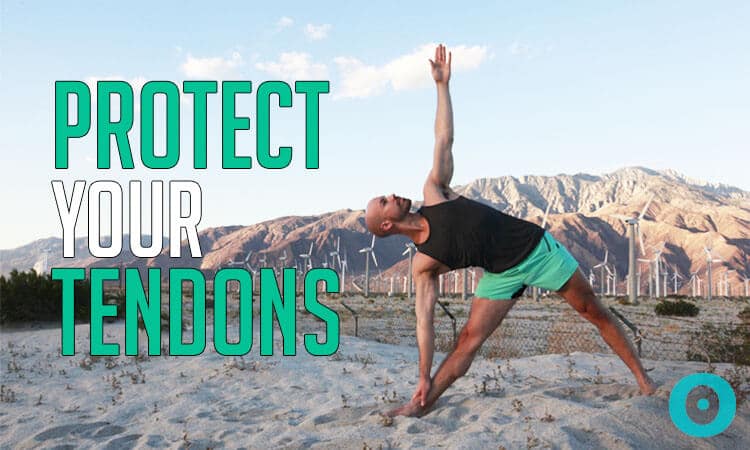
How to Prevent a Tendon Injury in Your Yoga Practice

The Badass Guide to Yoga for Men

Yoga and Shoulders: It's a Scapular Matter Part 2
Get Yoga Insurance & Protect Your Yoga Teaching Career Instantly
Save $24